Haverford College Honorary Spoon
In January of 2024, I delivered a unique commission: a large kolrosed spoon to be presented to Charley Beever, the outgoing board chair of Haverford College. This honorary spoon serves as a nod to a lost Haverfordian tradition that began in 1873 and faded away sometime in the mid 20th century. Originally, each incoming class of Fords was entrusted with a large wooden spoon, which they would later vote to award to the student they most admired upon graduation, granting that student the coveted title of “Spoon Man.”

It’s important to note that this tradition was practiced when Haverford College was an all-male institution. The college became fully co-educational by 1980, and the spoon tradition had faded away before that time.
In 2021, at a Haverford Alumni event in New York, College President Wendy Raymond was honored as Haverford’s first “Spoon Woman.” The event hosts, Alexander Robinson (class of '96) and Charley Beever ('74), presented President Raymond with a recently recovered antique Haverford spoon made by the celebrated 19th-century cabinet maker Daniel Pabst. This spoon had previously been awarded to Alexander Harvey Scott in 1886. During the event, Alexander Robinson shared the story of how this Haverford spoon surfaced on eBay. You can see an image of the original spoon and read more about this event on the Haverblog.
Carving the first Haverford spoon of the 21st century
Daniel Pabst’s beautifully handcrafted spoon, made 138 years ago and measuring 28 1/4 inches long, became the model for the first Haverford spoon in over half a century. One of the project's challenges was replicating the shape of the original spoon using only a few images and its length and width. Although my math was a bit rusty, I was able to determine the measurements for each feature of the spoon’s design.

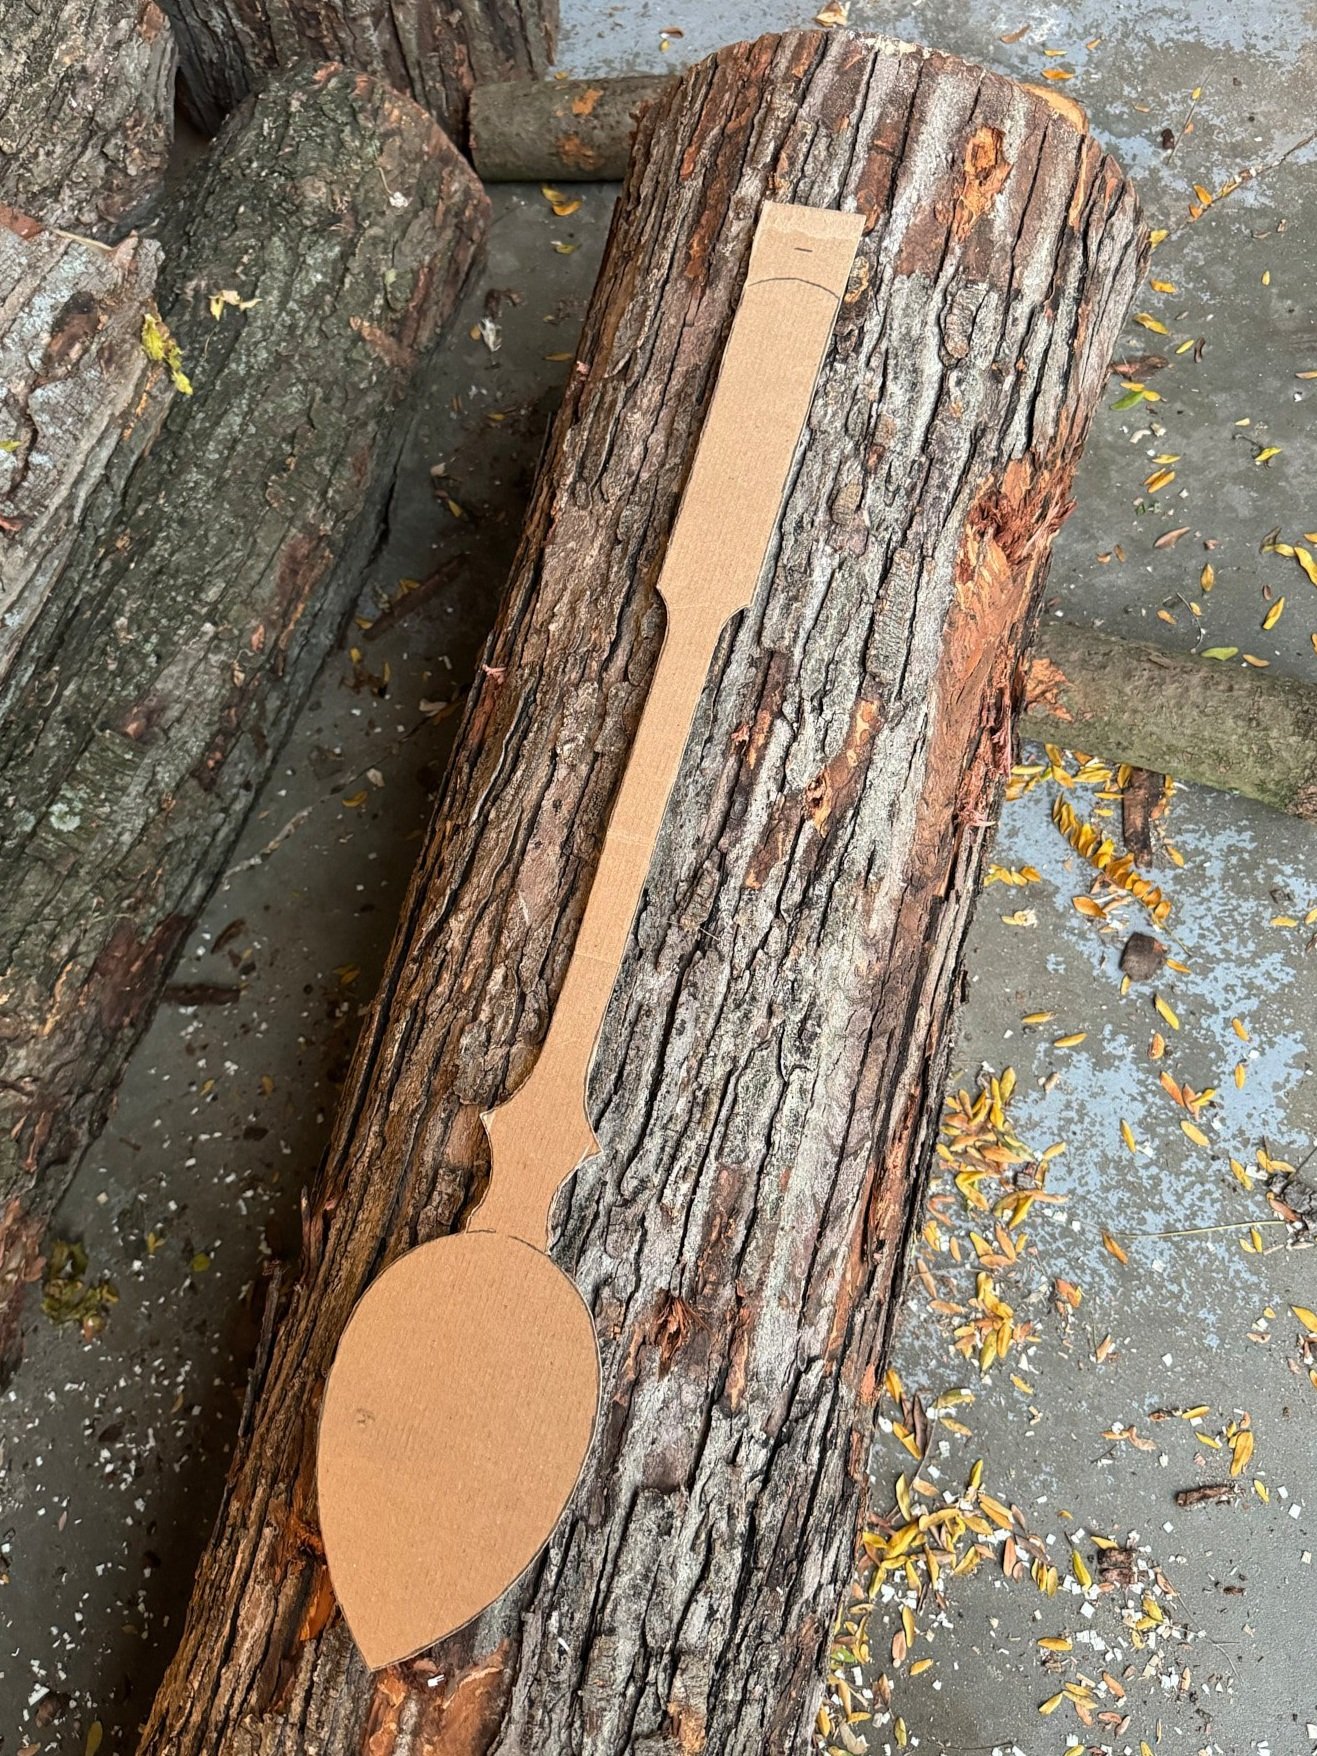
A cardboard template was made using my established sketch of the top profile, which I used to chainsaw the material to length.
For the material, I used some silver maple that was being removed just a couple of blocks away from my shop by a professional arborist. I had the chance to see the tree before it was cut down and understood the decision to remove it. This tree was massive and appeared to have a structural issue that put the four homes in its shadow at risk. I have great respect for tree care professionals who possess the expertise to tackle such complex jobs. The arborist leading the project mentioned that without their 20 years of tree-climbing experience, they wouldn’t have taken on this job.
Silver maple is on the softer side of hardwoods, however it lends itself well for kolrosing as the fibers are pliable enough to allow very good detail. Once the material was cut to length I split the log using a mallet, splitting wedges and a froe to make billets that were closer to the width and height of the spoon. The bark was then removed with an axe and the surface below cleaned up with a draw knife.
For contingency, it made sense to carve multiple spoons in the case there were any irreversible mistakes made along the way, particularly with the kolrosing.


After cleaning up the billets with a draw knife, I traced my cardboard template for the top profile. Unfortunately, I forgot to take any photos of the rough shaping process with the bandsaw, which I chose to use to reduce strain on my wrists, as I've been experiencing intermittent symptoms of carpal tunnel syndrome lately. Once I shaped the top profile, I returned to the axe for carving the side profile and rounding off the outside of the bowl.


For rough hollowing the bowl, I used an adze. Like an axe, an adze is an impact tool. It differs as it has a curved edge perpendicular to the handle.


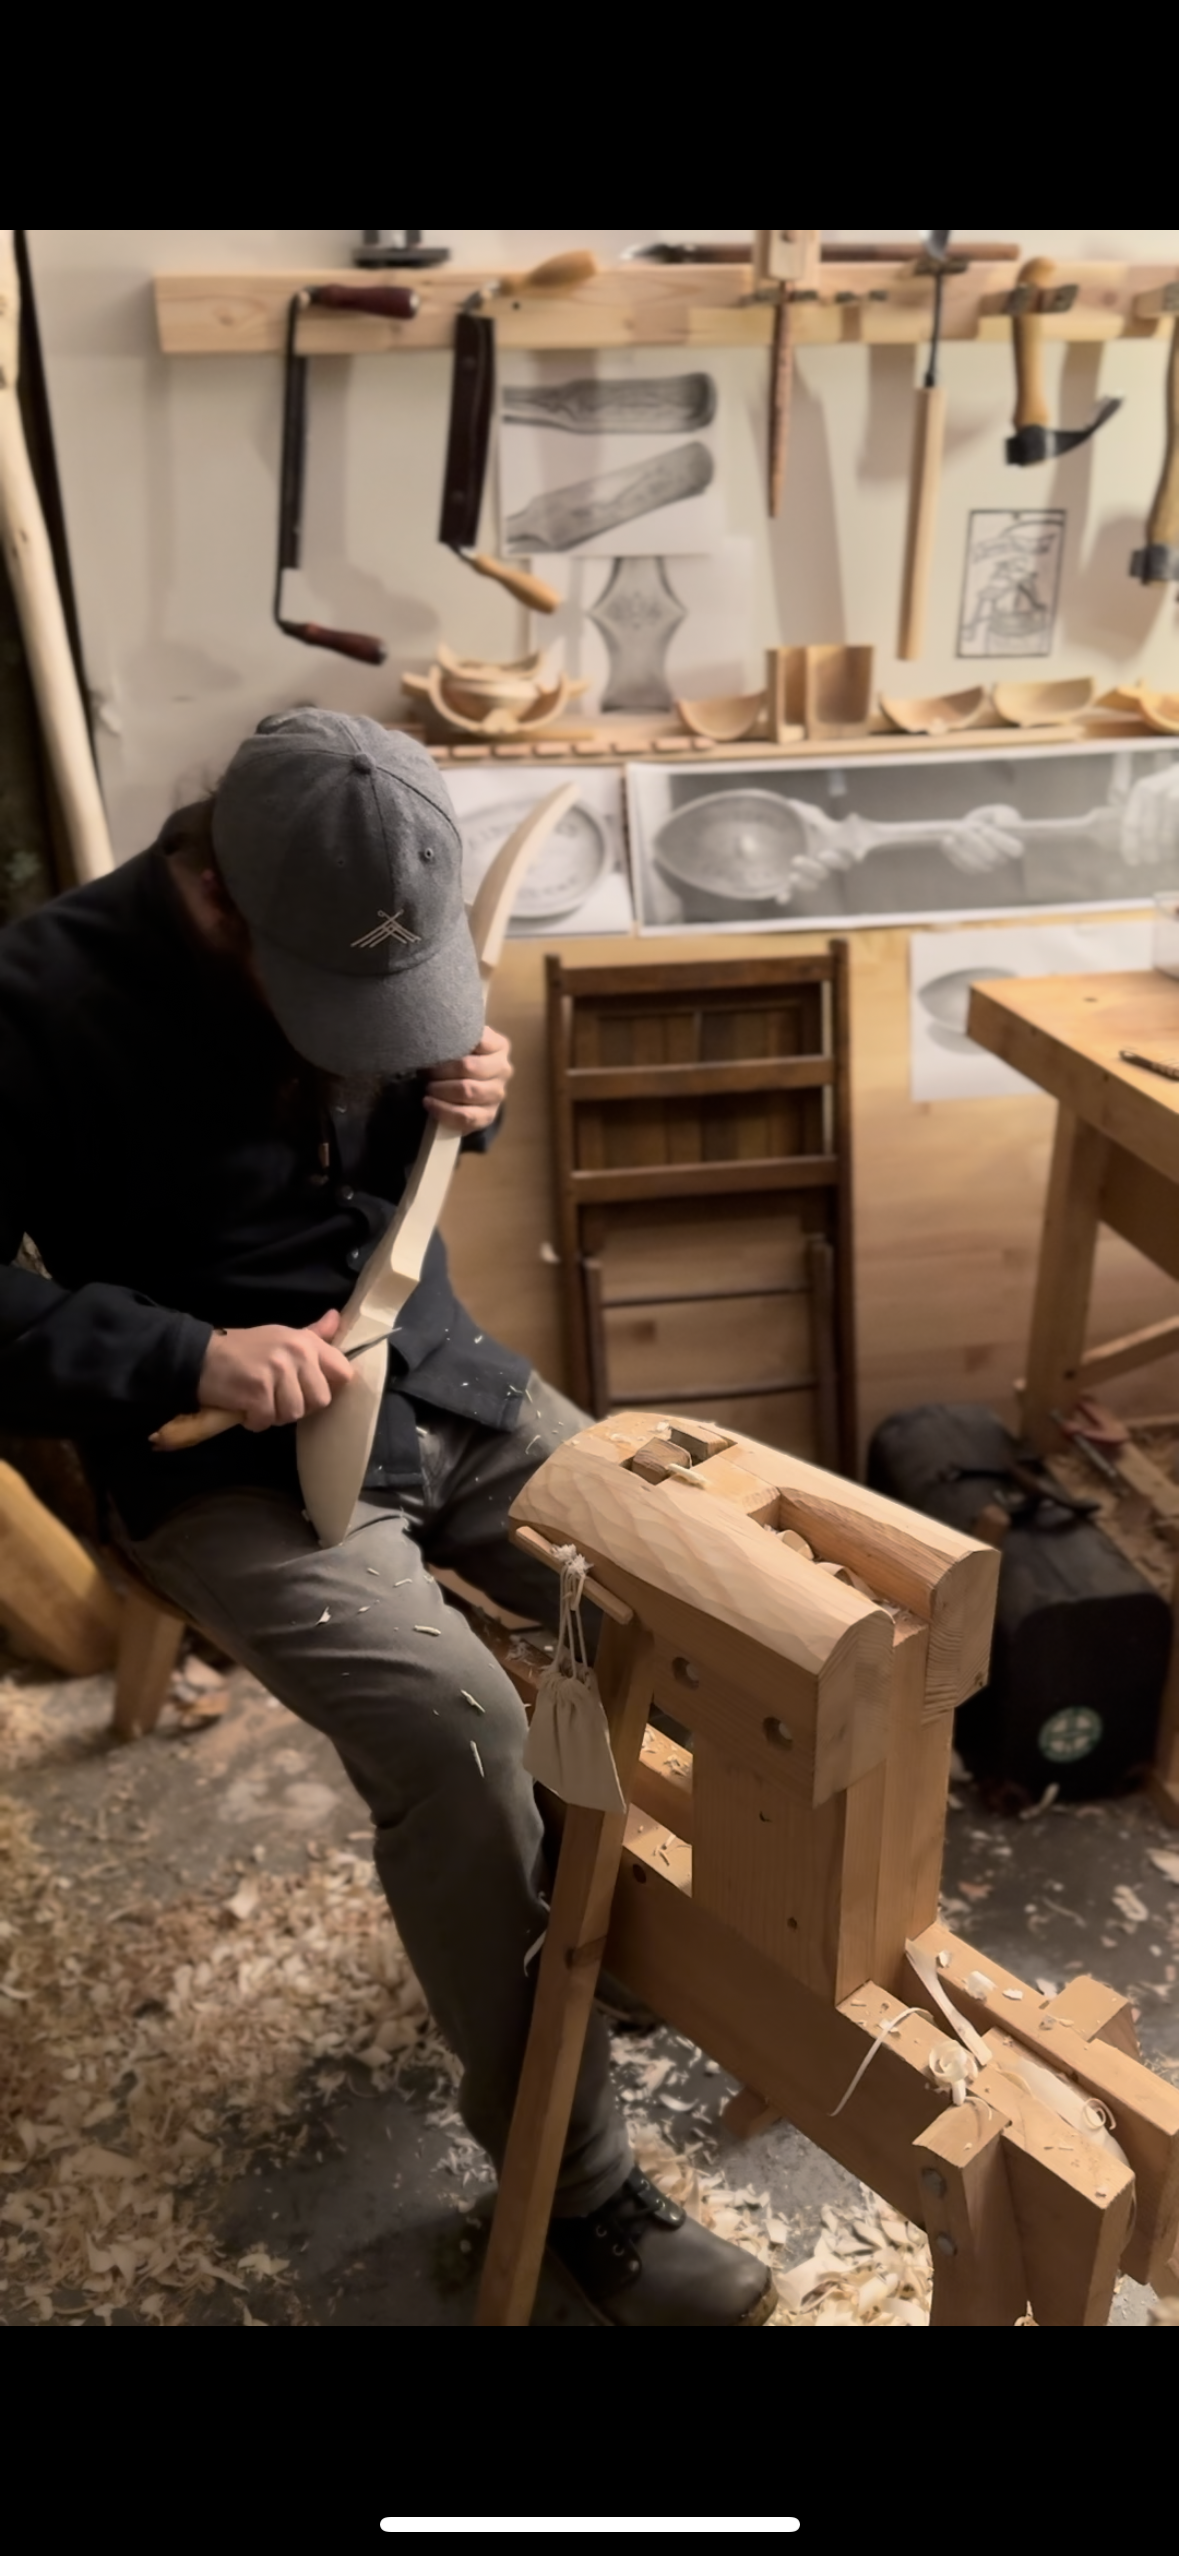
Following the impact tool work (axe/adze), I dusted off some work holding devices to do some drawknife work. Using a shave horse and a spoon mule I was able to further refine the top and side profiles.


When working on a larger work it definitely helps to have access to have a few options for work holding. Fortunately, I have both a shave horse and a spoon mule. The shave horse applies a larger downward clamping pressure, which allowed me to make larger cuts. The trade off is lack of access to the whole top surface of the work. That’s where the spoon mule comes in handy. The clamping mechanism of the mule pinches the work to hold it in place, which allows me to better access the whole length of the work. I found this the most helpful at fiber transition points where opposing cuts meet in a low spot. Another benefit of the mule was being able to comfortably sit and get a the leverage and control I needed to finish hollowing the bowl with a gouge and twca cam (the curved knife pictured below on the right).


The mule was also a great means of work holding for finalizing the surfaces using cabinet scrapers. With the scale of these spoons it was unrealistic to attempt knife finish, which is typically a key feature of my work. The scrapers worked well and I did end up following the scraped surface of the spoons with sandpaper before applying a finish.


This commission features a significant amount of illustration on the surface of the wood. The original spoon made by Daniel Pabst was decorated with techniques I’m unable to positively ID from the images, however I was confident that I could accomplish nearly the same effect with kolrosing. For those who are unfamiliar with kolrosing, it’s a very old Scandinavian form of decoration that consists of small incisions made with the tip of a knife and then filled with a finely ground colorant, such as ground bark, or in my case ground cinnamon. Once the colorant has been added, the surface is then rubbed with an object that gently compresses the wood fibers and closes the incisions, securing the colorant. Below you can see the technique demonstrated on a smaller spoon. The technique produces a very fine line. For shading I used a stippling technique with a home made tool that repurposed a sewing pin.


The technique that I use for kolrosing, taught to me by my incredibly generous and talented teaching/kolrosing mentor Liesl Chatman, relies completely on push cuts with the blade always perpendicular to the surface of the wood. I hold the kolrosing blade in my right hand with my thumb, pointer, and middle finger in a way that allows me to freely rotate the blade almost 90 degrees in either direction on the axis of the handle. This tool grip allows my right hand to act as the steering wheel for the cut. The power for the cut comes from my off-hand thumb, which is in contact with the surface of the wood behind the cut and gently rolled forward with downward pressure from my thumb into the surface of the wood. The controlled movment of my off-hand thumb rolling into the back of the blade gently pushes the blade. These cuts are made with great attention and care as they can not be un-done.

Before proceeding with the kolrosing I made a toning stick from an off-cut of one of the spoons. Not only did this exercise give me an opportunity to assess the appearance of different amounts of shellac, but it also gave me an opportunity to test how much detail I would be able to accomplish with a kolrosing blade and stippling tool before carrying out the most challenging phase of the project. Shellac prepares the surface of wood very well for kolrosing as it does not allow the pigment, in this case ground cinnamon, to enter the fibers of the wood outside of the incisions made with kolrosing tools.


Based on the level of kolrosing detail the wood was able to accept I drew designs on paper to be approved. When the drawings were finalized I used oil soluble pencils to redraw the design and kolrose in stages. For shading the bold typeface I used a stippling tool I made from a sewing pin and a scrap of wood as a handle. By using a single pin I was able to poke holes as tightly packed as the silver maple would allow at create as much contrast as I could with this technique. The stippling took a significant amount of time, however it was a nice break from the high pressure of cutting the outlines, which I only had one opportunity to get right.
When I began working on the reverse of the handle I had the idea to scan in my sketch and project it on the surface of the spoon. I now understand how effective this technique can be as the image projected can be composed within the given space, and adjusted to compensate for the distortion on a convex or concave surface. In the future I do plan on using this technique more to transfer designs to wood.
I’m disappointed that I wasn’t able to capture more of the kolrosing process, although I do have good reason for why I was not able to. Halfway through the kolrosing stage of this project I had the misfortune of severe flareup of carpal tunnel symptoms from a previous week of unrelated work. For an entire week, and the remainder of this commission, my right hand and wrist was completely numb. Thankfully kolrosing is not a physically demanding task and I could could take it on in small doses.


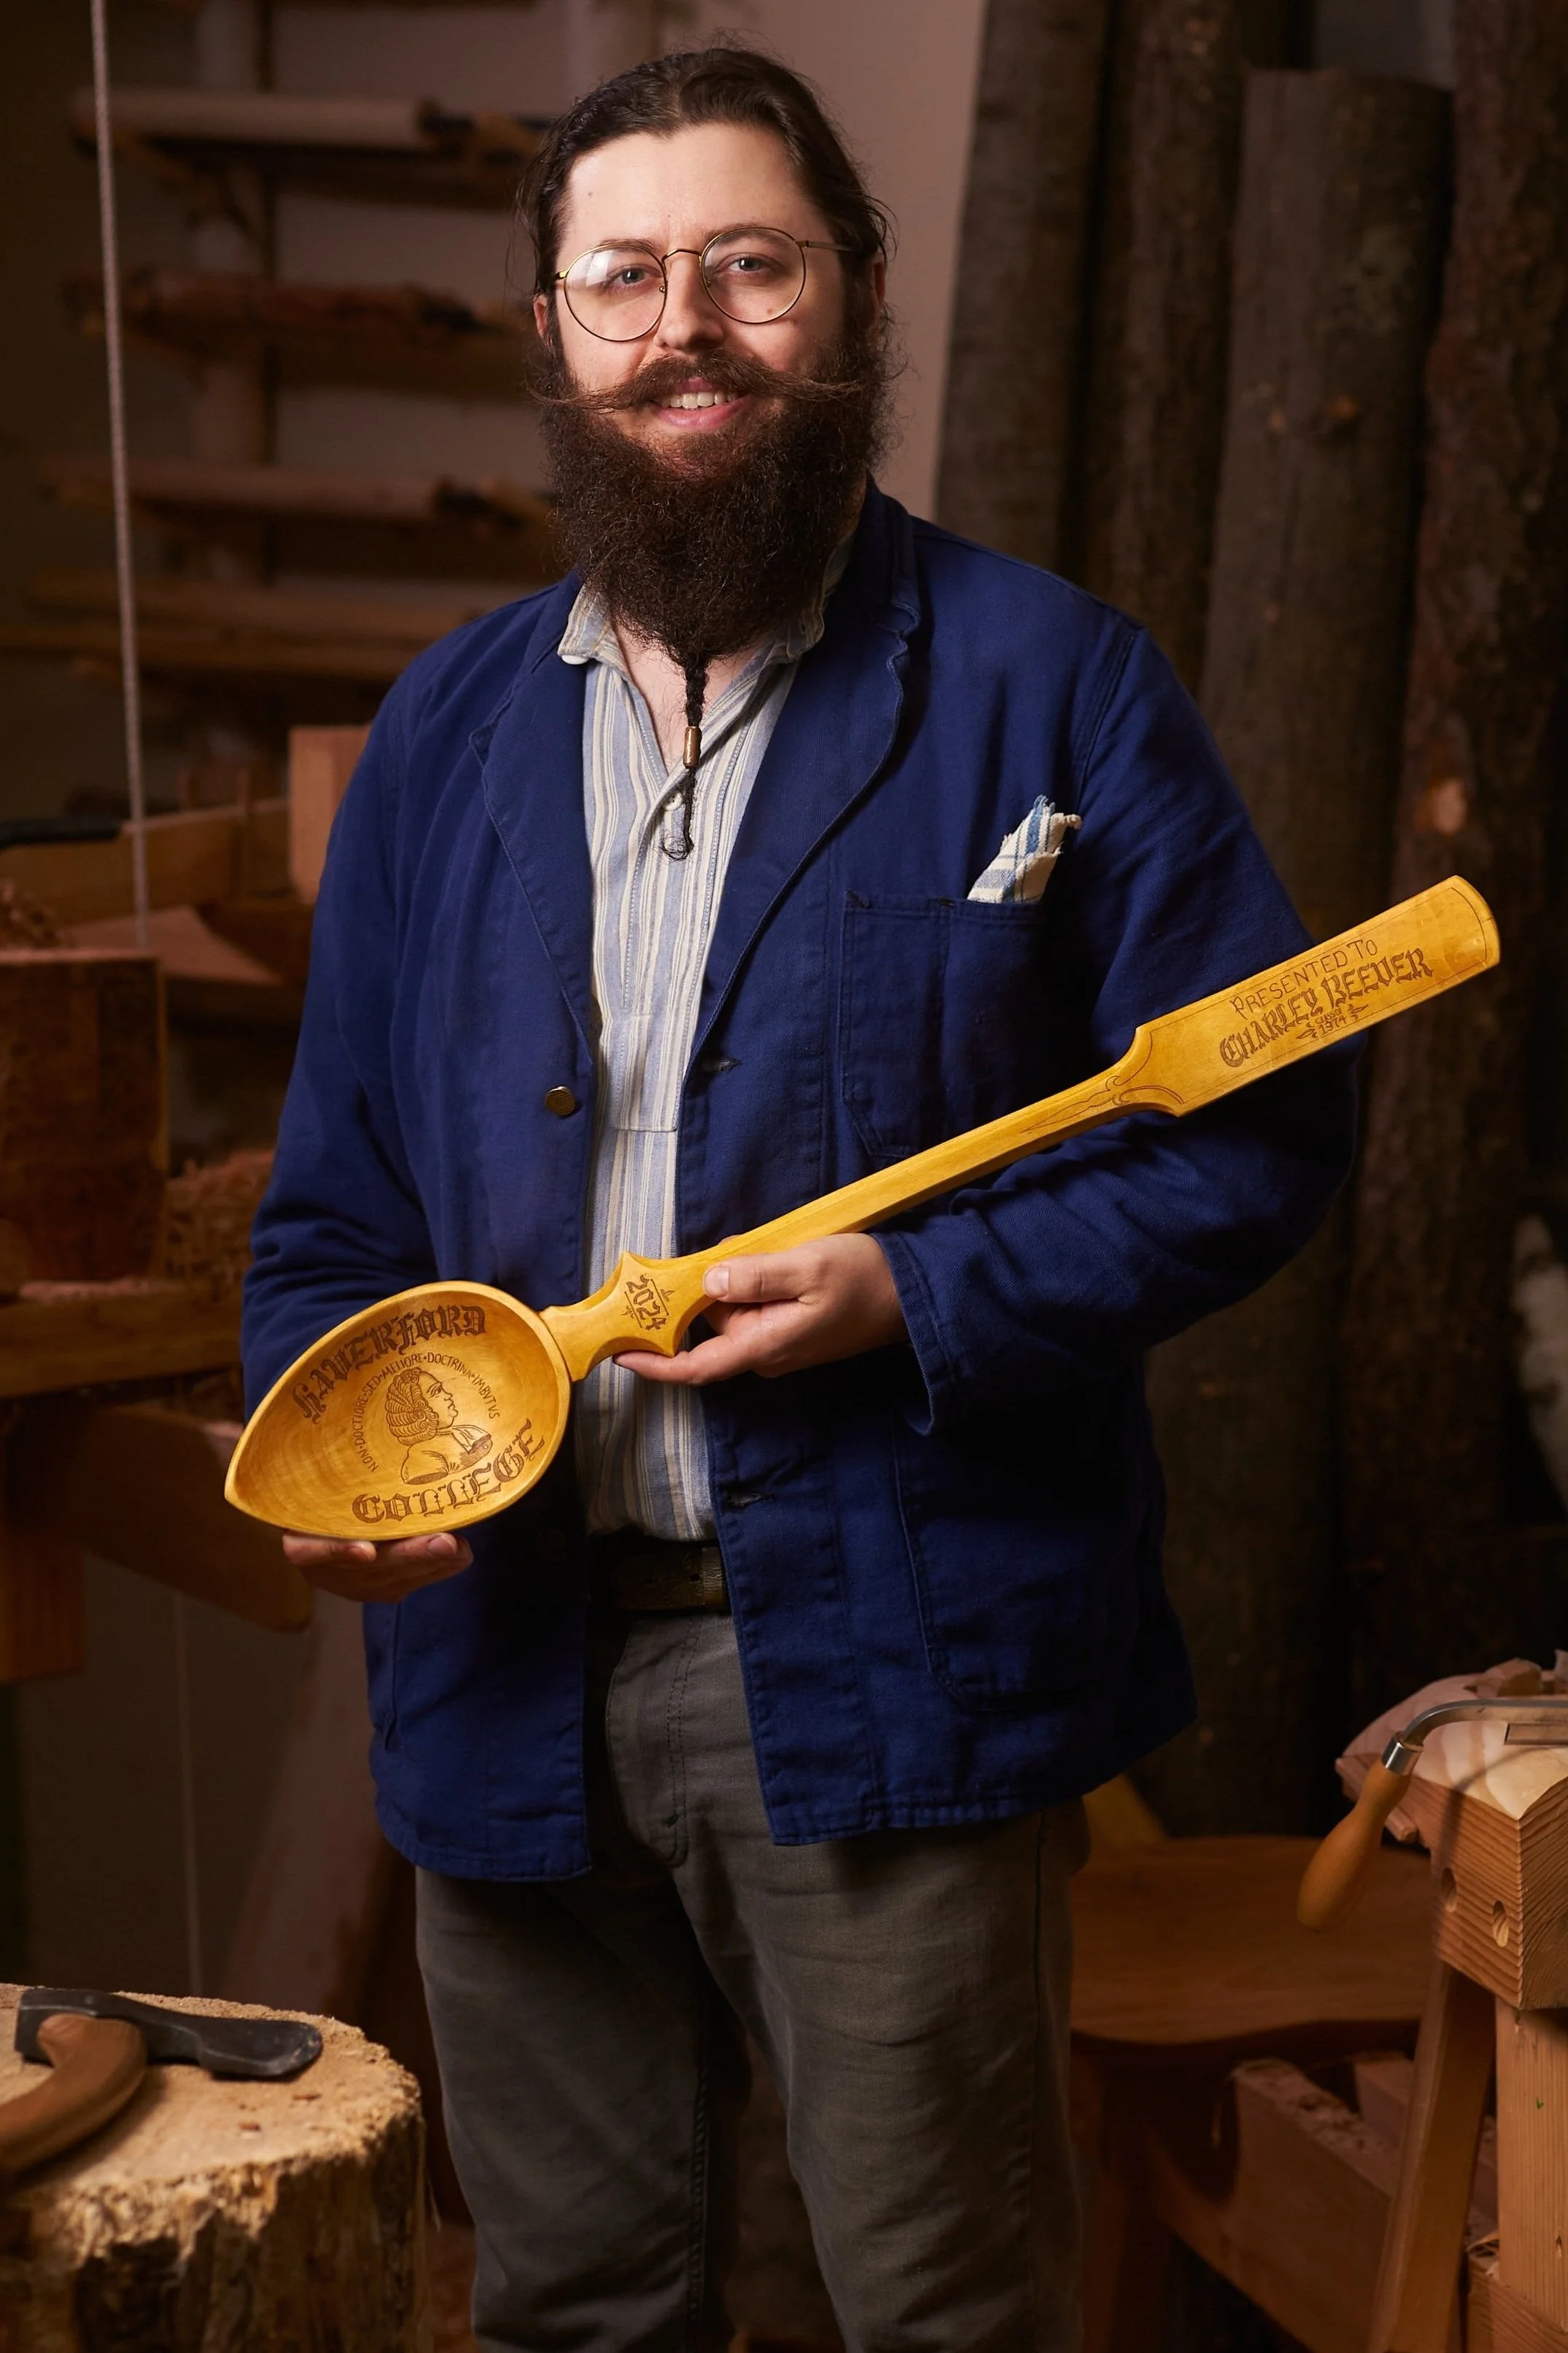
The end result certainly is something to be proud of. I’m incredibly grateful for this commission and being a part of the return of this unique tradition!